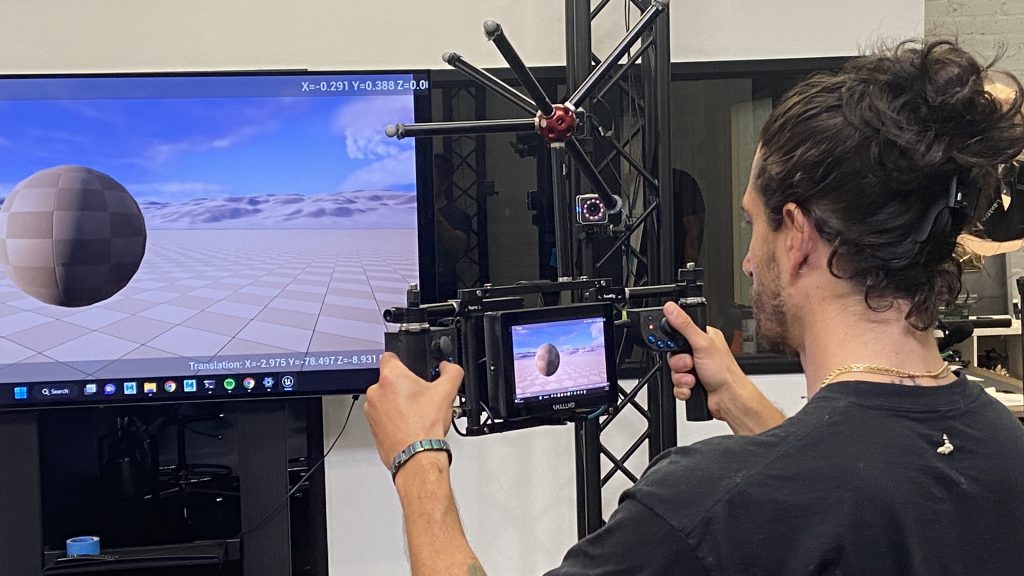
Download the latest software from here.
The download zip will contain the following directories:
- desktop – the windows desktop application
- mobu – the motion builder plugin
Desktop Application
Run: desktop/VCamDesktop.exe

This application receives live data from the joystick devices, customizes and interprets what each button is to do and passes the interpreted message on to the 3D application.

The Desktop app must run on the PC that the usb dongle is connected to. When the dongle is connected, click “Connect”. When the connection is successful, “CONNECTED” will appear at the top right.
If the desktop app does not receive data from the joystick for more than a second, the background color will change to brown.

Enter the ID numbers at the top for each joysticks if they do not populate correctly or are in the wrong left/right order.

The desktop application can be used to simulate the joystick controls for testing. For example the circle representing the joystick can be clicked and dragged to simulate the user operating the joystick and the buttons can be “pressed”.
Settings

The settings can be customized via Options Menu -> Settings.
The Layout dropdown controls how many joysticks are shown – A single one, a pair, or two pairs. The two pairs can be shown horizontally or vertically in the main window.
The revision dropdown controls which joystick revision is available in each panel. Use “Rev1” for the joystick that has a switch control and 4 buttons. Use “Rev2” for the playstation joystick that has the scroll wheel and trigger button.
The first “Targets” group is for the first pair or joysticks. Add the host name and IP address of any PC’s that need to receive the messages – i.e. instances of Motion Builder or Unreal Engine.
The second “Target”s group is for the second set of joysticks. Ad the host name and IP address of any PC’s that need those messages. Make sure to use a different port number if the are running on the same PC.
The listen port is where the software listens for messages, specifically from PeelCapture. Set this to a unique port.
Peel Capture

Rev1 Joystick configuration
Each joystick can be configured as follows:

A/B/C/D – Button Assignment
E/F/G/H – Joystick Axis Assignment. Setting one side will clear the other, allowing for positive/negative mappings. For example setting E will clear G.
I – Visual indicator of current joystick position
Motion Builder
Copy the correct version of the motion builder plugin to the motion builder plugin folder, for example, copy mobu/PeelCam2023Device.dll to:
C:\Program Files\Autodesk\MotionBuilder 2023\bin\x64\plugins
Launch motion builder and drag the PeelCam_Device in to the 3d window

Make sure the desktop app is running, then turn the device online and create a model binding:

Press Ctrl-E over the 3D Viewport to view though the camera.

Add a relation constraint to your scene:


Drag the PeelVCAM:Camera object in to the relation constraint and set it as a destination. Right click on the node and set it to local transforms:

The node need to be in “local” mode as the parent node is a “magic carpet” that is used to move the camera around. Your mocap system should drive the camera in local space, relative to the magic carpet.
For example, add a Vicon device and create a model binding:

Find the root node for the prop representing the vcam in Vicon:

Use the root bone (or a child null) as the source of the constraint. The source device should be world space, not local.
