PeelDev Unreal Plugin Guide
After installing the plugin in your project’s Plugins folder and restarting Unreal, you’ll see the PeelDev icon in the toolbar at the top of the Editor.
Clicking the icon reveals three options:
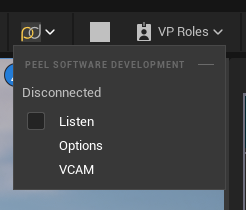
- Listen – Enable or disable the connection between the PeelVcam Desktop applications on your network and the Unreal plugin.
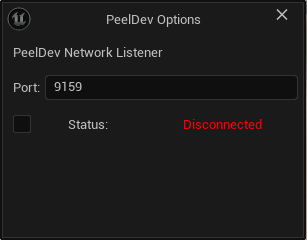
- Options – Open a dialog where you can change the default listening port and check your connection status.
- VCAM – Launch the PeelVcam Tool, an editor utility widget that provides access to nearly all Unreal-specific VCam functionality.
Getting Started
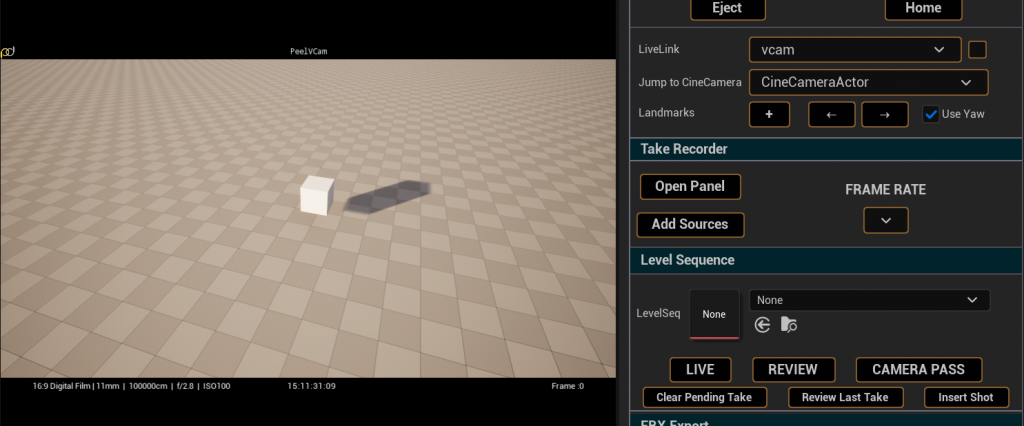
In the top section of the PeelVcam Tool, you’ll find four main actions: SPAWN, EJECT, PILOT, and HOME.
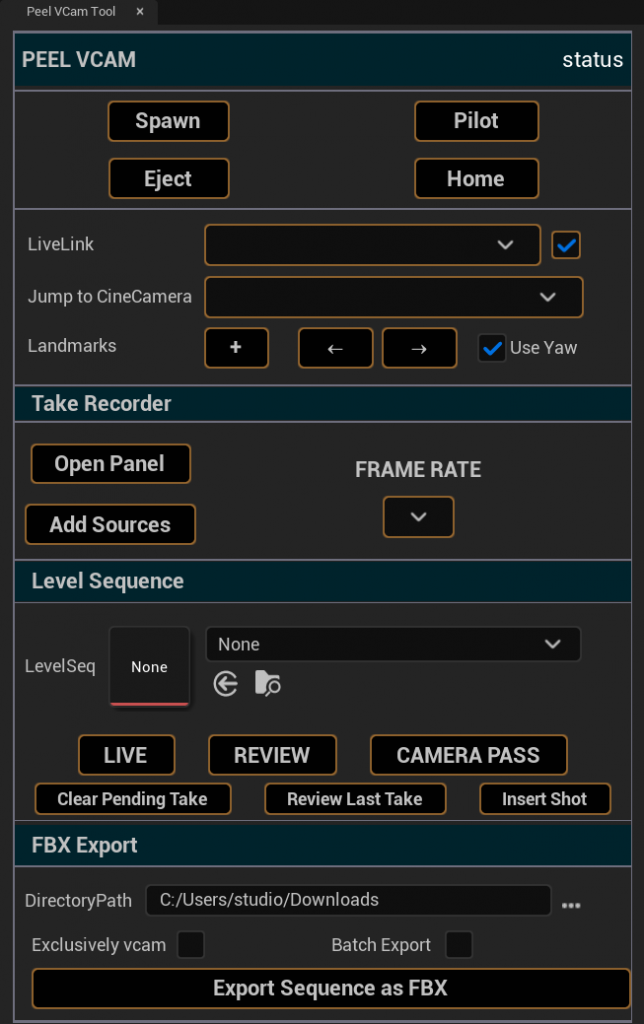
- SPAWN – Adds a VCam to your Outliner with the following hierarchy:

- PeelVcam_Base_BP – A null actor used to define a VCam origin other than (0,0,0).
- Dolly_BP – For keyframed dolly camera moves.
- MagicCarpet_BP – A virtual platform the operator “stands” on; navigation controls move this actor, letting you fly through the scene.
- PeelVCam_BP – The cinematic camera. Position and rotation are driven by mocap data, while lens settings come from the PeelVcam Desktop app.
- EJECT – Exit the PeelVcam cinecamera view.
- PILOT – Drive the active viewport from the PeelVcam cinecamera.
- HOME – Reset all transforms on the VCam (except Live Link data), aligning directly with mocap input.
Adding Live Link Data
- From the menu bar, go to Window > Virtual Production > Live Link.
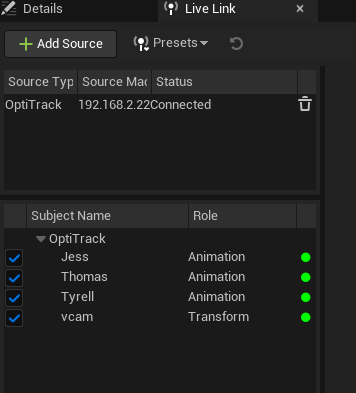
- Add your Live Link source in your mocap software (requires a rigid body capable of streaming to Unreal).
- In the Live Link panel, select the subject you want to drive the VCam.
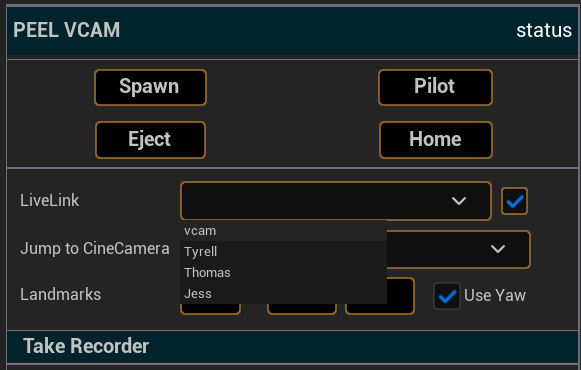
Once selected, the VCam will immediately begin moving with your Live Link data.
Tip: Use the checkbox next to each Live Link source to quickly toggle input. This is especially useful during sequence playback, when Live Link could override keyed animation.
Saving and Recalling Locations
There are two ways to reposition the VCam:
- Jump to CineCamera – Move the PeelVcam to the location of an existing CineCamera actor in your scene.
- Landmarks – Save and recall the PeelVcam’s transform directly.
Jump to CineCamera
- Add a CineCameraActor in your scene.
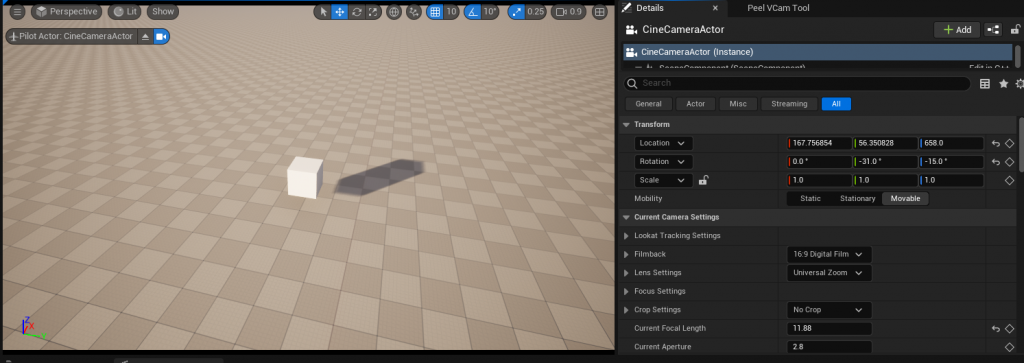
- Use the Jump to CineCamera dropdown to move the PeelVcam to that same location.
Landmarks
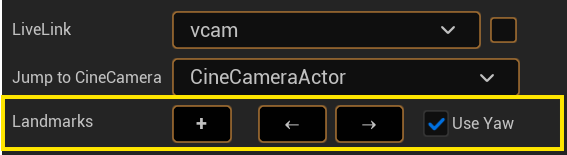
- + – Create a proprietary PeelLandmark actor at the VCam’s current world position and rotation.
- ← / → – Jump the PeelVcam to the previous or next saved landmark.
- Use Yaw – When enabled, the PeelVcam’s yaw matches the landmark. Disable if you only want to snap position while keeping Live Link rotation.
Take Recorder
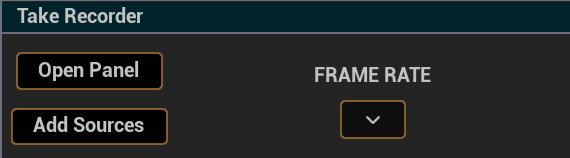
- Open Panel – Opens the Take Recorder panel (the PeelVcam HUD references this for display info).
- Add Sources – Adds PeelVcam_BP, MagicCarpet_BP, and Dolly_BP to the Take Recorder source list.
- Note: By default, Dolly_BP is added but disabled, so you can record without overwriting existing dolly keyframes.
- Frame Rate – Sets the recording framerate.
Sequencer Tools
In the Level Sequence section, you can load sequences, record non-destructive camera passes, review takes, or insert shots as subsequences.
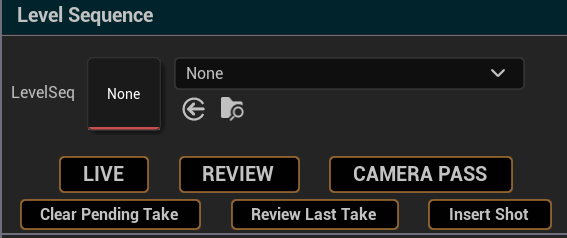
Start by selecting a sequence using the picker or dragging one in.
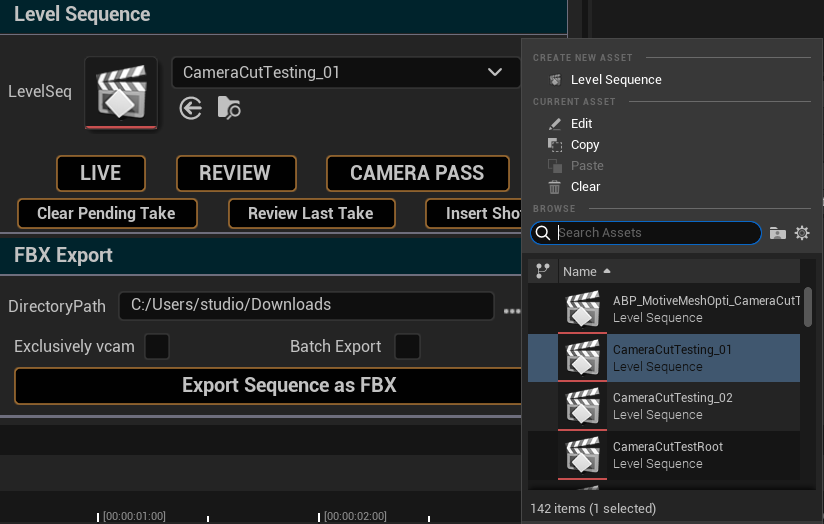
- Live – Exit review/camera pass mode and return to the Take Recorder’s pending take.
- Review – Load the selected sequence in read-only mode.
- Camera Pass – Copy the selected sequence into the pending take, allowing you to record new VCam passes non-destructively (adds “_CP” suffix).
- Clear Pending Take – Discard any added keyframes or bindings.
- Review Last Take – Load the most recently recorded sequence for playback.
- Insert Shot – Add the selected sequence as a shot track at its recorded timecode. (Unlike UE’s default behavior, which inserts at the timeline cursor.)
FBX Export
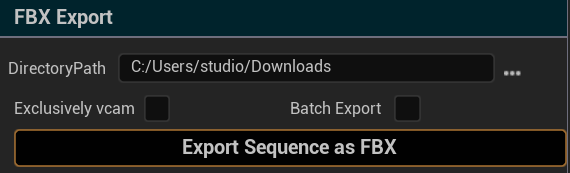
The FBX Export section lets you export sequences directly, with options for filtering and batch processing.
- DirectoryPath (…) – Choose the destination folder.
- Exclusively VCam – Export only VCam actor bindings from the sequence.
- Batch Export – Export multiple selected sequences as separate FBX files.
- Export Sequence as FBX –
- If Batch Export is enabled, exports all selected sequences.
- Otherwise, exports the currently open sequence.
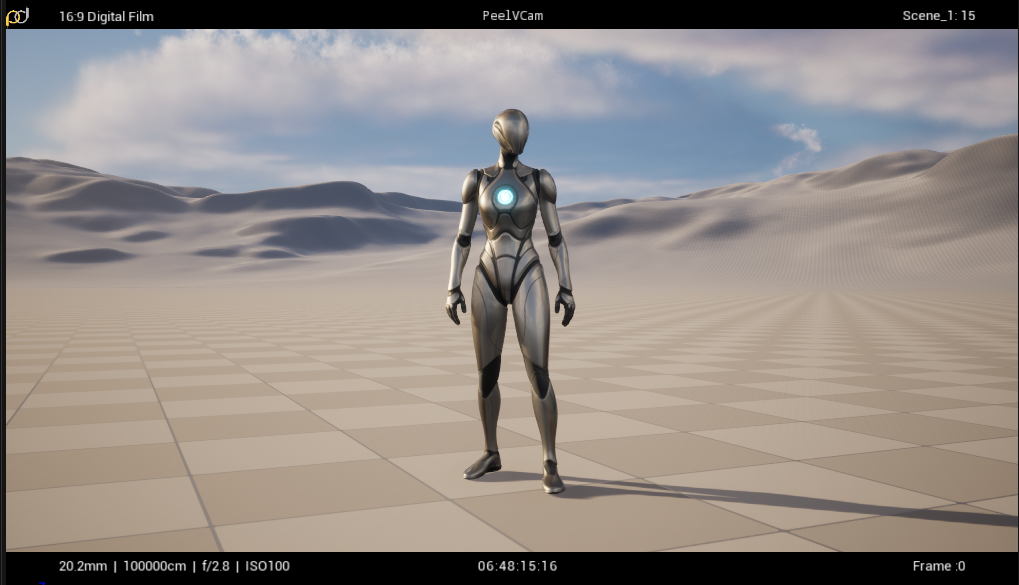
VCam HUD
When active, the PeelVCam overlays a letterbox HUD at the top and bottom of the frame.