
Video Tutorial
Written Tutorial
Click + symbol to add Ki Pro into the Device Panel.
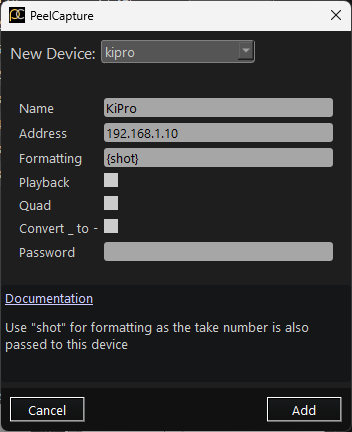
Name: Name of Ki Pro in Devices Panel.
Address: IP Address of the ki pro on the network. The front panel will show this via the config menus.
Formatting: Defines how to name the take on the device
Playback: Check to allow the device to play back takes when requested.
Quad: Check if the device is a KiPro Quad, so the harvest tool knows to look for the quad suffix.
Convert _ to –: Convert underscore to hyphen. Some ki pros (older?) will crash without this set.
Password: Set the password if the device is password protected.
Take Formatting notes:
{take} = the name of the current take
{shot} = the name of the current shot
{n} = the current take number
{id} = the current take id (incremented for each take)
{device} = the name of the device.
for example if the device is name “kipro1” and the take is “sc001A_tk001” the formatting could be:
{device}_{take} – kipro1_sc001A_tk001
{shot} – sc001A
The ki pro will always add the take number at the end as and _n and may also add another _1 _2 _3 or _4 if the device is a ki pro quad.
Address Notes
The Ki Pro’s IP Address is located by pressing Config and navigating to 50.2 DHCP Address. A DHCP address is required to connect to Peel Capture. If this setting is different, navigate to 50.1 IP Config in Config and change this setting to DHCP.
Browse to device
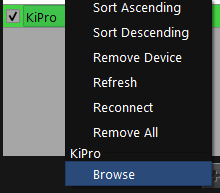
Right click on the KiPro device in the device list and select “Browse” to open the ki pro web interface, or type the ip address of the device in to a browser
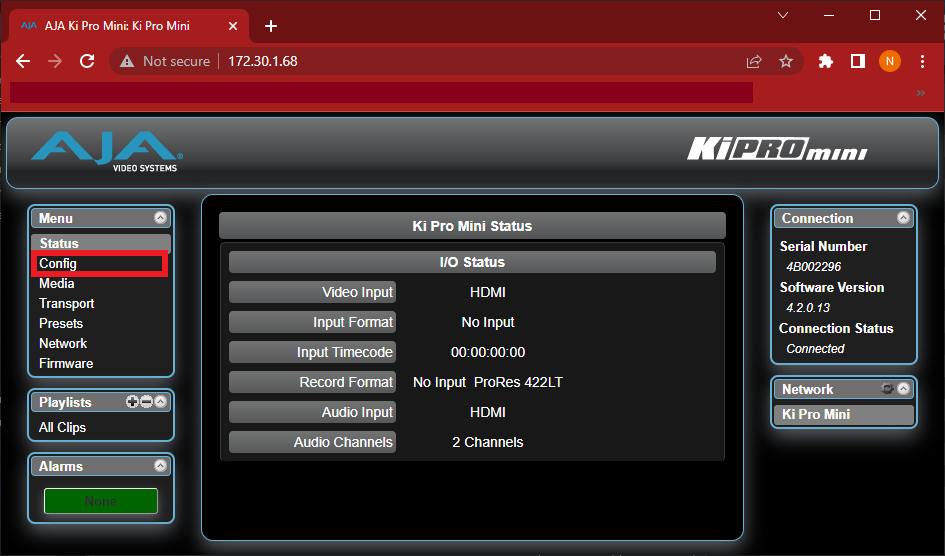
2. Find the Config tab within the menu, marked with the red box above.
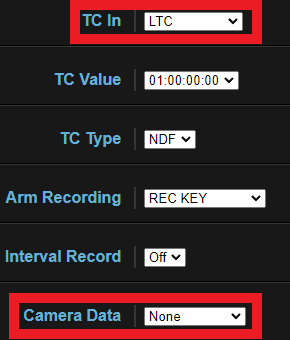
- Select TC In found within the drop-down menu and change to LTC.
- Under CAMERA DATA, confirm SELECT to NONE.
To add additional Ki Pros, in the NETWORK Tab of the AJA Interface window select the another Ki Pro and repeat the above steps.