After a shoot has finished, you can upload the video reference, mocap data and other files to the PeelCapture website. The site will list the mocap sessions and the takes for each session. Video files from the shoot can be reviewed and start/end timecode ranges can be selected from the reference and used to create an “order”.
The website is available for beta testing. Please contact support at peeldev dot com for access.
Registration
Click on the “Register” link at the top right of the homepage. Enter your name, email and new password. An email will be sent do the email address to confirm registration.
After clicking on the link in the email, you will be asked to log in again.
When logging in the first time you should see this page:
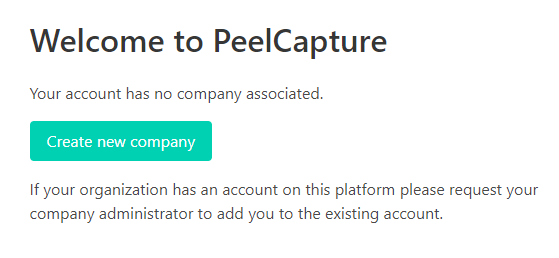
If you are the first user for your organization to log in, click “Create new company” to create a new company. Companies can have users, manage online storage, billing and create projects, shoots and takes.
If someone else has created a “company” on the site for your organization, do not create a new one, but have them link you to the company they have created.
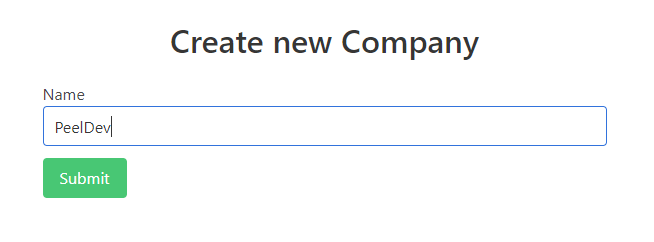
Enter the name of the new company if you need to create one.
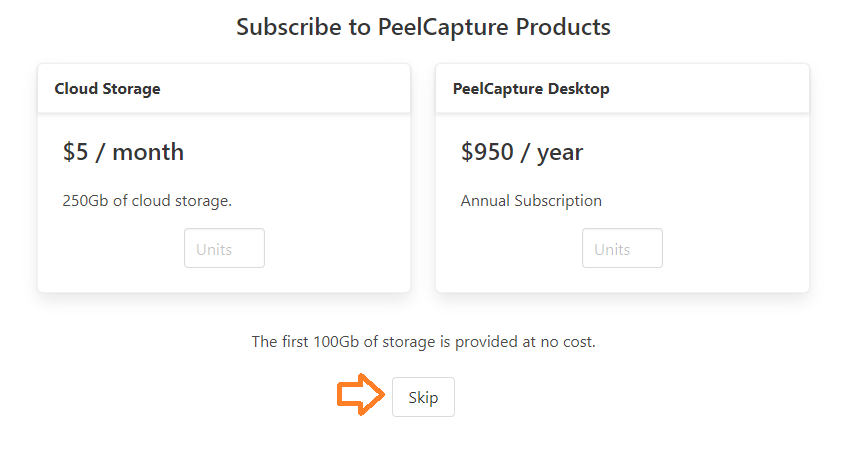
When you get to this page, click “Skip”. The storage pricing is has not yet been finalized.
Site Navigation
The site navigation is as follows:

1 – Logo – Links to hompage
2 – Projects Menu – click to see all projects, use dropdown to select a project
3 – Orders Menu – click so see all orders, use dropdown to select an order
4 – Downloads – Links to download page
5 – Company Page – Edit Users, Billing, etc
6 – User Page – Change Password, etc
7 – Logout from the website
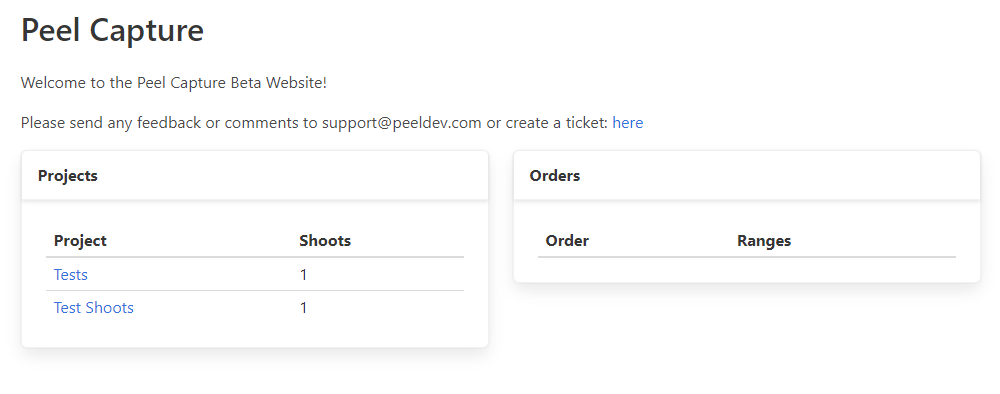
Homepage
The homepage shows current projects and Orders.
Projects Index
The project index page shows current projects (linked to your company) and projects that have been shared with you (from other companies)
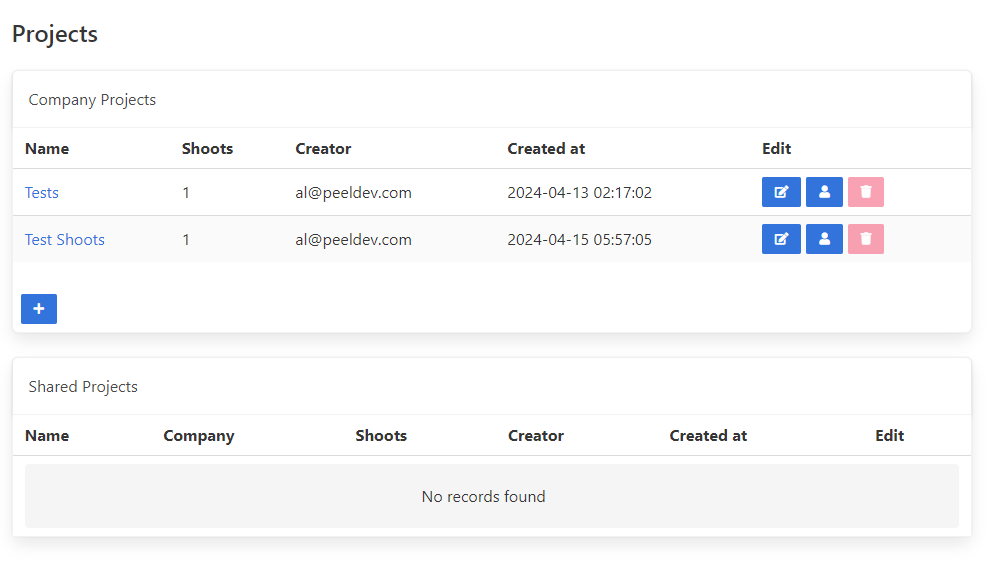
Click the “+” icon at the bottom to create a new project.
Adding data to the site
Once you have a company and project set up, now would be a good time to switch to peel capture to generate some data for the website.
If you do not already have it installed, click on Downloads in the navigation bar and select “PeelCapture” to download the installer.
In the PeelCapture file menu, select “Settings” and select the “PeelCapture” tab:
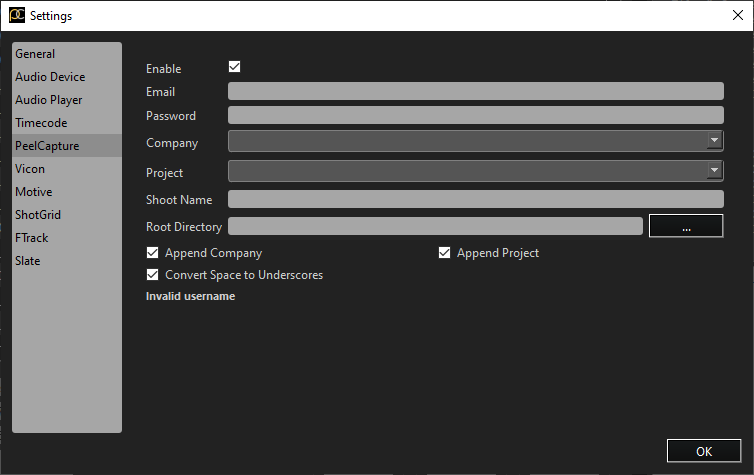
Enter the following information:
Email / Password – The email address and password you used to log in to the website. After entering the password, click anywhere outside the password field to log in and populate the dropdowns.
Company – select your company from the list.
Project – Select the project you are working in, or select “–add–” to create a new project.
Shoot Name – Leave this blank
Root Directory – A folder on your computer or local network for where files should be saved, e.g. “D:\MOCAP”
Append Company / Project – Add the company name and project to the root directory for saving data, e.g. D:\MOCAP\Peeldev\Project1″. You may want to use the company field in the path for cases where other companies will be sending you data or you are working with multiple clients who have the own accounts on the site.
Convert Space to Underscores – If you have a space in an of the fields (company name, project etc), convert the space to an underscore. It is a good idea to leave this on.
Click Okay to close the dialog.
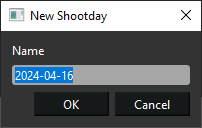
Now choose “New Shoot” from the File dialog to create a new shoot:
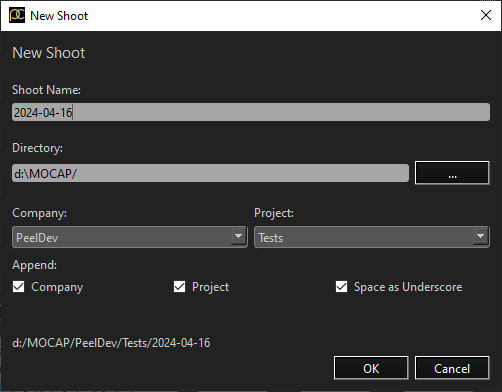
The default name for a shoot is the current date. You can change it to whatever you would like the shoot name to be.
The other fields are copied from the settings (see above) and usually do not need to be changed. The directory where the shoot will be created is shown at the bottom.
Click okay to create the new shoot.
In the devices panel, click the “+” icon to create a new device:
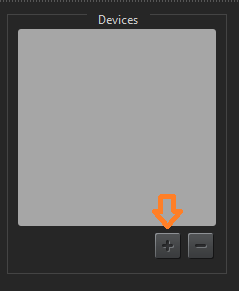
The “epic-iphone”, KiPro and hyperdeck devices are also good for testing how the website works as these devices support collecting files (“harvest”) and produce video files with timecode.
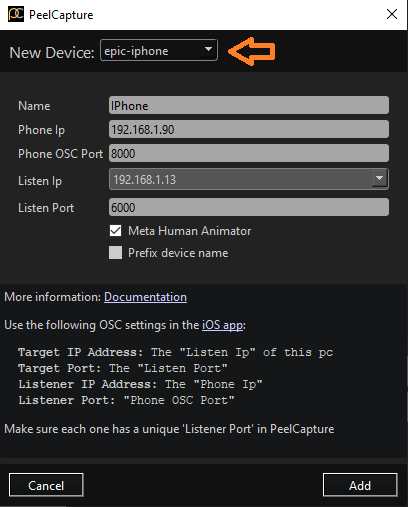
More information about setting up this device can be found here.
Record some takes using the device.
After you have some recordings done, select the menu: “Publish” -> “Collect Files” to copy the files from the device.
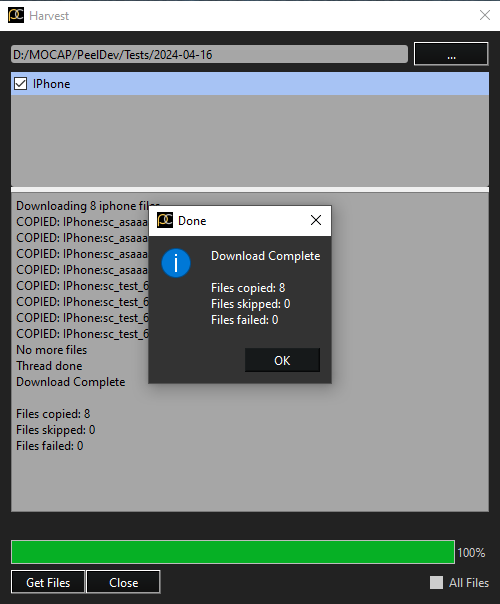
The files will be copied to a folder in the shoot directory, named the same as the device. To browse to this directory use the “File” -> “Browse Data” menu.
To upload to the website, choose “Publish” -> “PeelCapture”
You should get a prompt to create the new shoot day:
Click Okay to create the shoot day on the website.
The upload tool is used to upload data to the online storage and to download files from storage.
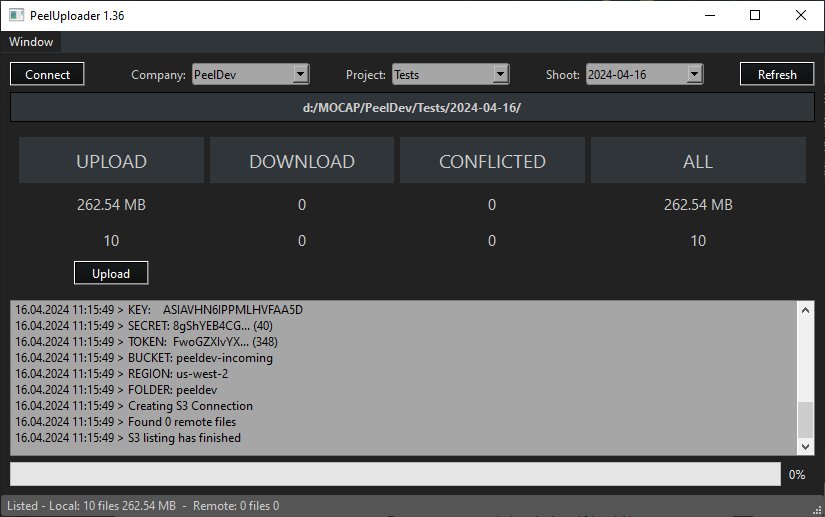
UPLOAD – Shows how much data is stored locally that is not in the cloud
DOWNLOAD – Shows how much data is in the cloud that does not exist locally
CONFLICTED – Shows how much data exists in the cloud and locally that is different
ALL – Shows the total of all files, both locally and in the cloud.
The fields for Company, Project and Shoot should all be set and the shoot directory should already be found. The dropdowns can be changed if you want to switch to a different project.
Click “Upload” to send data to the website, or “Download” to get data from the website..
When uploading, if you see this popup:
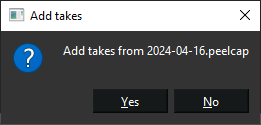
Click “Yes” to add the take entries on the website. This will populate the website with the takes. It is a good idea to say yes when uploading the first time, but no if adding more data later.
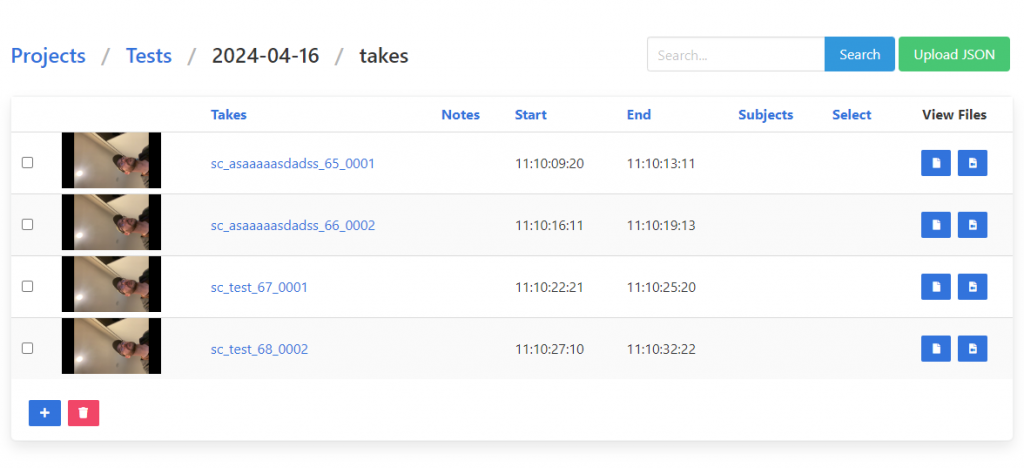
Now if you switch back to the website and select this shoot, you should see the takes listed:
If you click on one of the takes you should see the detailed view for the takes:
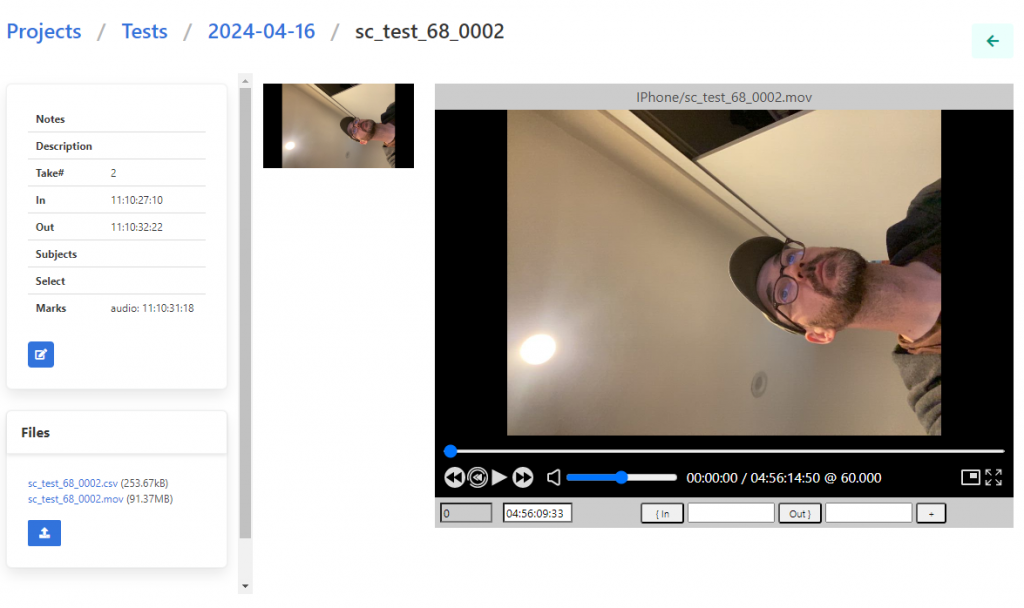
The left panel shows the metadata for the take and the files that have been uploaded.
The right panel is a video player that allows selecting ranges.

1 – The time slider can be used to change the current frame
2 – The transport controls can be used to start and stop playback or step frames
3 – The current frame and timecode are shown at the bottom left
4 – Press “{ in” or “out }” to mark an in or out frame for a range that needs to be processed. Press “+” to save that range to an “order”.
The create range popup appears after pressing “+” under the video player:
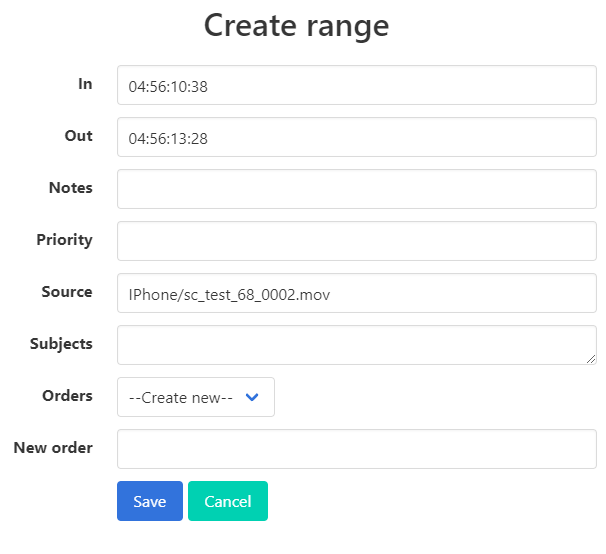
This dialog can be used to enter a new range to an order. If no orders exists create a new one using the dropdown.
The Notes, Priority and Subjects fields are text fields which can be used to pass information that be needed to help process the range.
Click “Save” to add the range to the order.
Click “Orders” at the top of the page to view all orders.
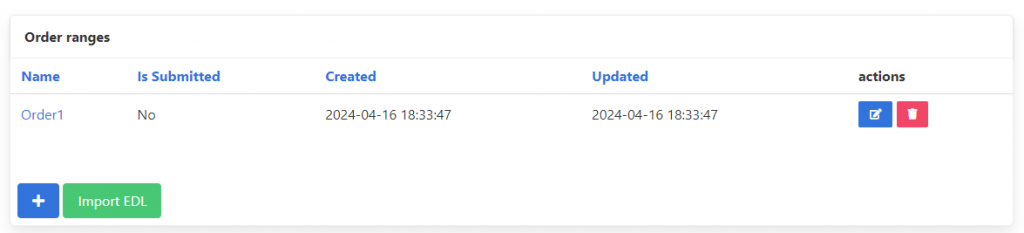
Click on an order to view the ranges associated with that order.
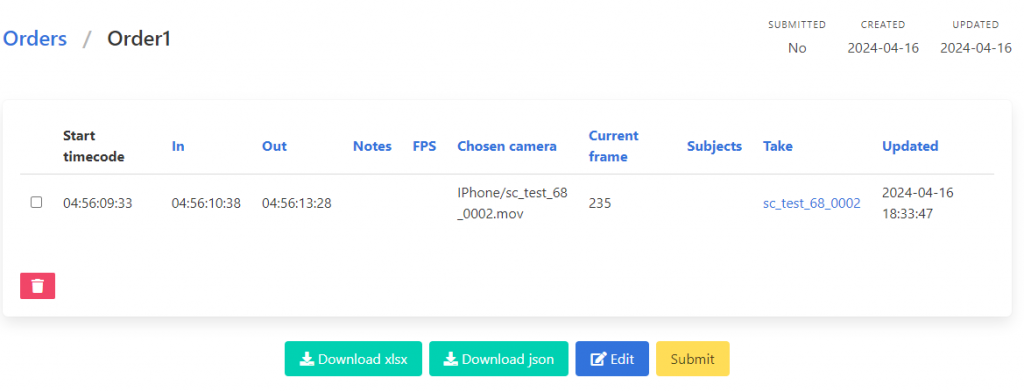
Click “Submit” to submit the order. After submitting it the order cannot be edited and new ranges cannot be added to it.
Downloading Files
This section describes how to to download files that have been uploaded.
Download PeelCapture if you don’t have it already installed. You do not need a working license of PeelCapture to use the file transfer tool.
Run “Uploader.exe”;
Add a “New Peel” Connection:
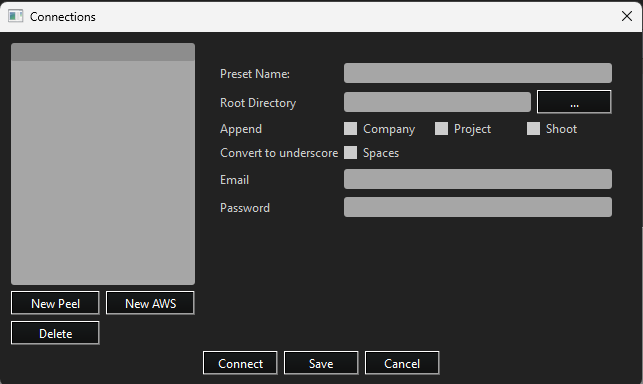
Preset Name: The name for this saved connection
Root Directory: The base directory for where the files will be saved, e.g. “d:\MOCAP”. The Company name, project and shoot day directories can optionally be added to that directory path.
Append: Enable the checkboxes to append the company name, project name and shoot day name to the root directory. It is recommended to enable these to keep the files managed correctly.
Convert to underscore: Enable this to convert any spaces in Company, Project and shoot day names to underscores. It is recommended to enable this.
Here is an example:
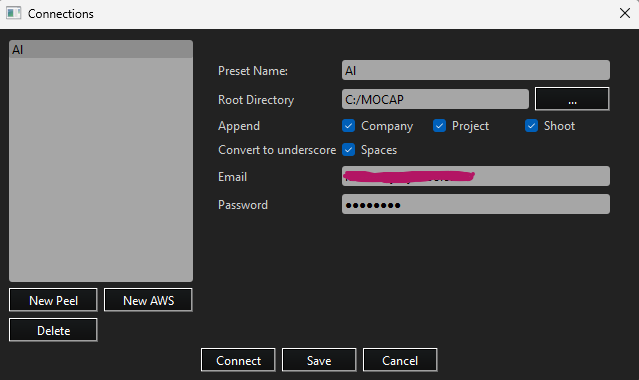
This will save local data to this directory:
C:\MOCAP\Company_Name\Project_Name\Shoot_Day\
If you have a specific directory you want to download the files to you can specify it as the root directory and leave the checkboxes unchecked:
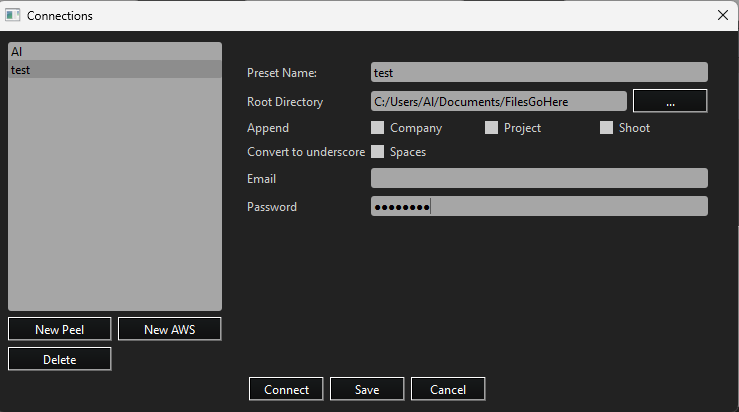
The above example will save all files you download for the project and shoot you select to:
c:\Users\Al\Documents\FilesGoHere
This is fine to do if you are only working on a single shoot, but it is recommended to use an “Append” to help manage multiple shoots, projects or companies.
When you have the credentials set up, Click “connect”
Select the company, project and shoot day using the dropdown menus at the top of the main window.

When you have the Company, Project and Shoot selected, there may be a pause while the file tree is synchronized.
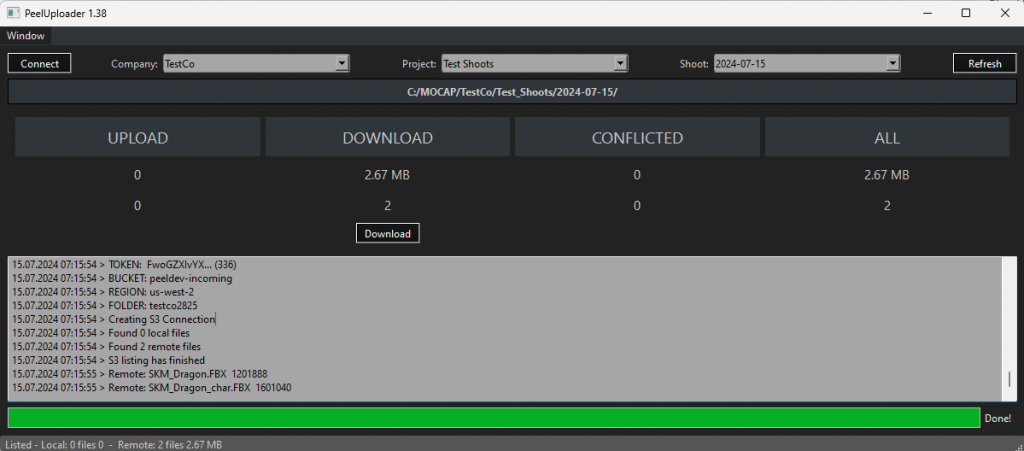
The sections are:
Upload – Files you have locally that do not exist on in the cloud
Download – Files that exist in the cloud that do not exist locally
Conflicted – Files that exist both in the cloud and locally that are different sizes
All – The total size of all thedata.
The rows are:
Total Size
Total Count
Action button.
Press the “Download” button to download the files or upload button to upload the files
If you have conflicted files (where the file size locally is different than the file size in the cloud) you will see an entry in the conflicted column:
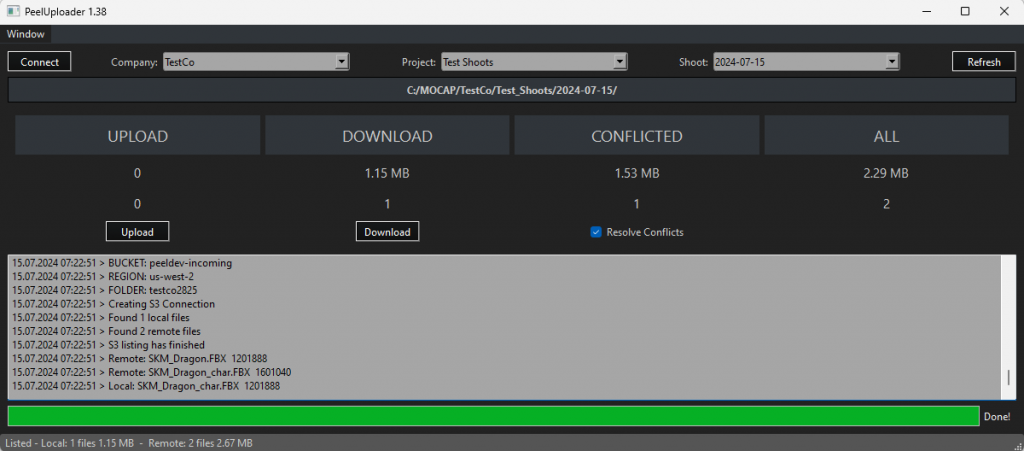
Conflicts are resolved by checked the box and clicking on upload or download. If you click upload, the file in the cloud will be overwritten with the file you have locally. If you click download the file you have locally will be overwritten with the file in the cloud.
If you leave “Resolve Conflicts” unchecked, no files will be overwritten.
File Browser
You can use the file browser to view the file tree. It is opened by selecting “File Browser” from the “Window” menu at the top left.
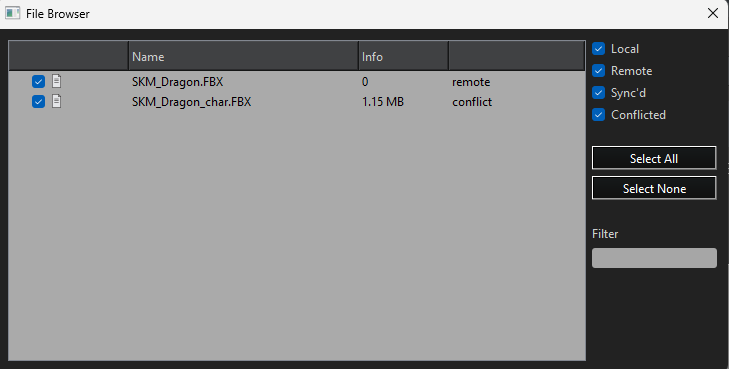
The check boxes on the right will show or hide different files.
The checkboxes next to a file will add or remove it from the list of files to be transferred.
Select All will select all the files that are currently shown.
Filter will allow listing of matching files by name or partial match.