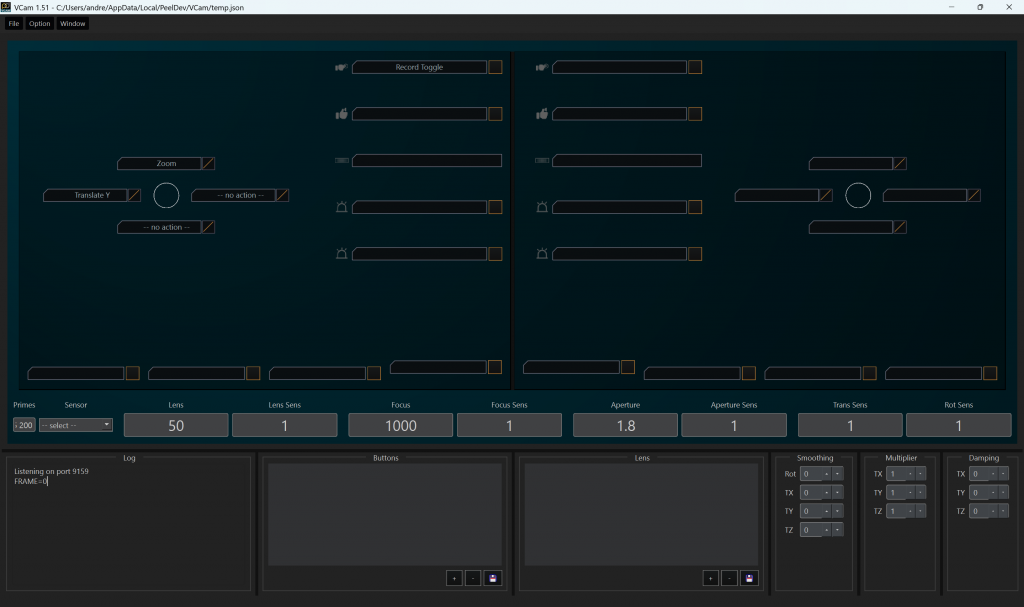
This application receives live data from the joystick devices, customizes and interprets what each button does and passes the interpreted message on to a 3D application such as Unreal Engine or Motion Builder.
Quick Setup Guide
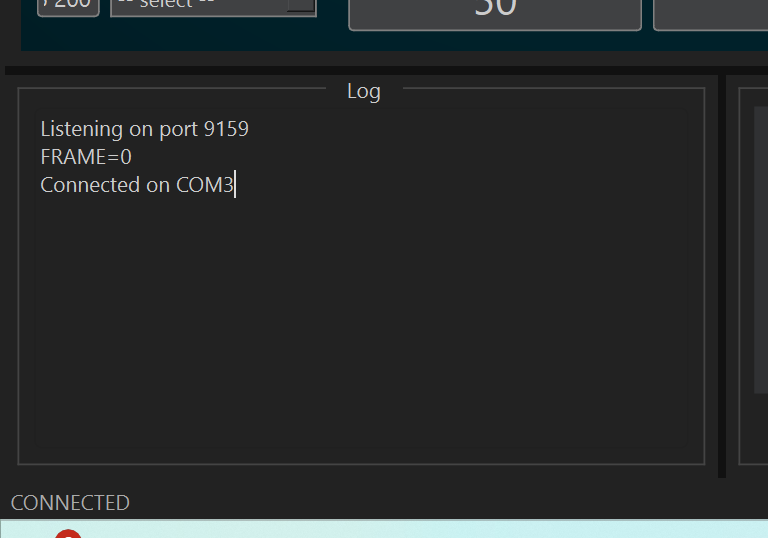
- Plugin the USB dongle to the computer with the VCam Desktop App. When the connection is successful, CONNECTED will appear in the bottom left corner of the application window.
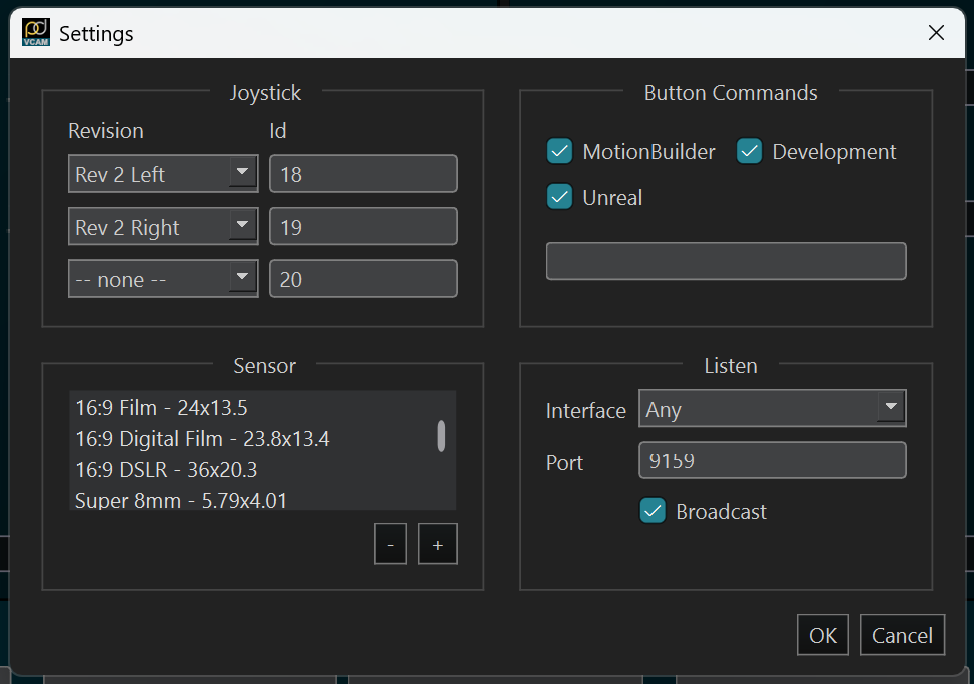
- Configure Settings in Options → Settings.
- Use Revision Dropdown in Joystick section to select the correct VCam controller versions and enter their corresponding Ids.
- Add Target value for the corresponding program you want to use. If the programs are on the same machine as this app, use 127.0.0.1:9158 for UE5 and 127.0.0.1:6123 for Motion Builder.
- Select the Button Configuration Options in Button Commands. There are different command options per application, unselect any option you are not using for the current session.
- Press OK to confirm settings
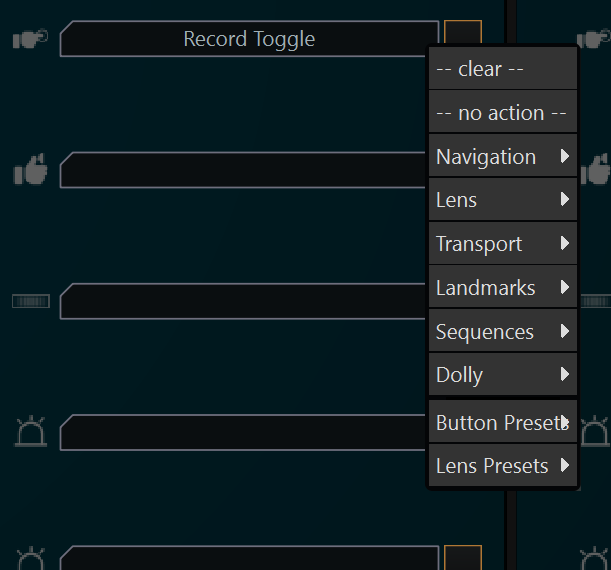
- Assign the functionality for each button on your controllers from the different binding options. Note that there are different button bindings for the joysticks, buttons, and LEDs.
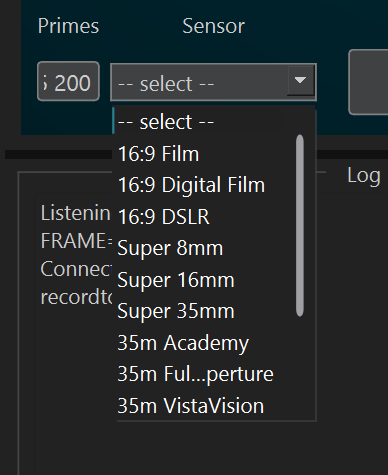
- Select Camera from Sensor dropdown.
- Save current configuration with File → Save As.
- Optional Steps:
- Create Button Presets
- Create Lens Presets
Button Testing
The desktop application can be used to simulate the joystick controls for testing. For example the circle representing the joystick can be clicked and dragged to simulate the user operating the joystick and the buttons can be “pressed”.
Joystick Configuration

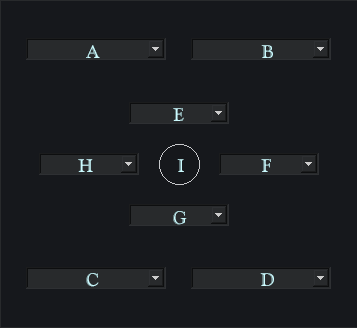
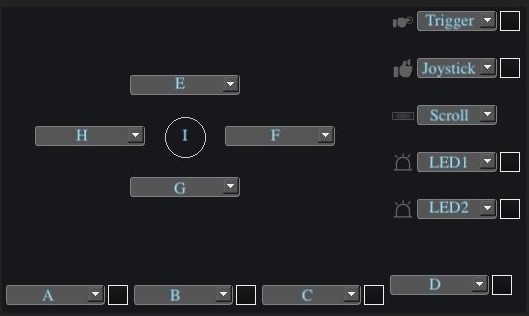
Legend
| A/B/C/D | Button Assignment |
| E/F/G/H | Joystick Axis Assignment. Setting one side will clear the other, allowing for positive/negative mappings. For example setting E will clear G. |
| I | Visual indicator of current joystick position |
| Trigger | Button on the backside of the joystick |
| Joystick | Similar to L3/R3 on PlayStation controllers the analog sticks are clickable by pressing down |
| Scroll | Scroll wheel on the back of the controller |
| LED1 | Upper LED |
| LED2 | Lower LED |
Bindings
| Binding Options | Description |
| Aperture Up/Down | Increase/Decrease Aperture Value. |
| Buttons | Change current button preset. |
| [^]Buttons | Temporarily change the button assignments to a different preset while button is held down. |
| Debug Focus | Turns on the Debug Focus Plane in UE |
| Focus | Adjusts focus distance (only supported for UE). |
| Frame Beginning/ Prev/Next | Go to beginning, previous, or next frame in the current timeline. |
| Key Add | Add keyframe to the timeline. |
| Key Prev/Next | Go to the prev/next key in timeline. |
| Landmark Set/ Prev/Next | Set new landmark in Unreal or go to prev/next preset landmark. |
| Lens | Assign lens presets to a button. |
| Online | Visual indicator that the joysticks are online. |
| Play Start/Stop/ Toggle | Trigger Play on all devices added to your PeelCapture session(see here for more details). |
| Possess | Possess Object in Scene |
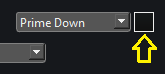
| Prime Up/Down | Jump up/down to the next/prev focal length on the “Primes” list. |
| Record Start/Stop/ Toggle | Trigger record on all devices added to your PeelCapture session(see here for more details). |
| Rotate X/Y/Z | Rotates Camera along the corresponding axis. |
| Snap Rotate -90/180/90 | Snap rotate the camera by -90/180/90 degrees |
| Translate X/Y/Z | Translates Camera along the corresponding axis. |
| Transport | Visual indicator of the recording status. |
| Zero Magic Carpet | Move camera back to origin. |
| Zoom In/Out | Adjusts focal length. |
Settings
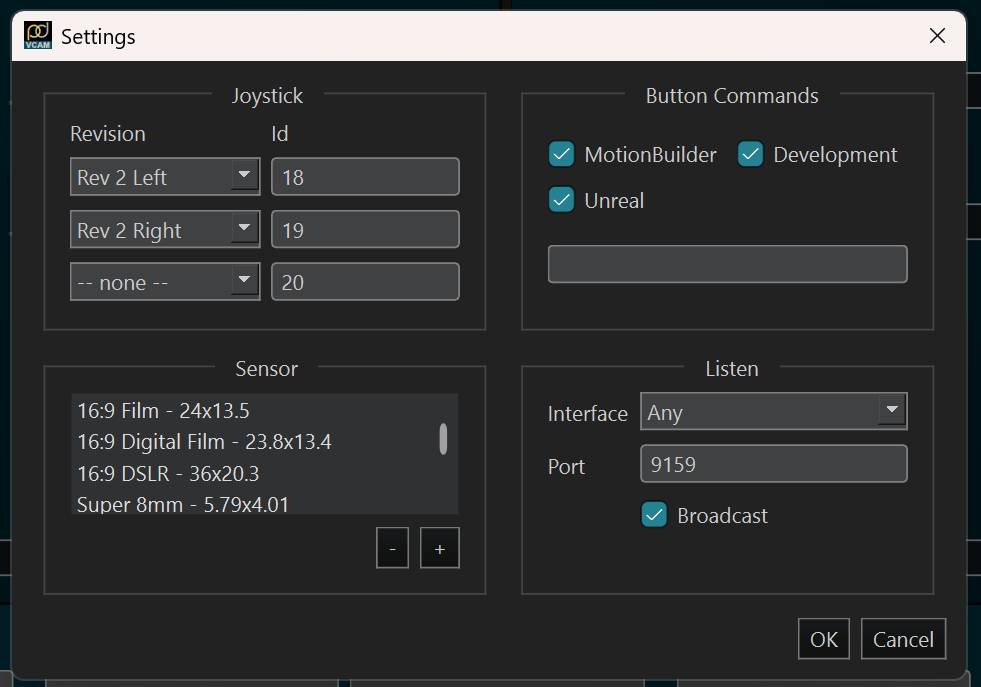
The settings can be customized via Options -> Settings.
Joystick: Select with joystick version and input the corresponding Id – A single one, a pair, or three devices.
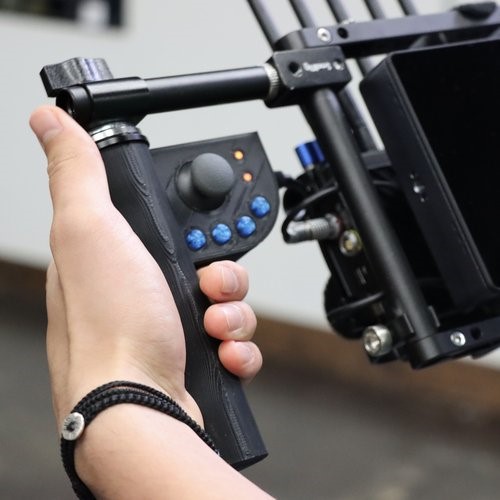
Revision: Dropdown controls which joystick revision is available in each panel. Use “Rev1” for the joystick that has a flat analog slider and 4 buttons. Use “Rev2” for the larger controller with a gamepad joystick, 4 buttons, 2 leds, a scroll wheel, and a trigger buttons.
Sensor: Add or delete different sensor options to be available for the sensor options dropdown.
Button Commands: Select which specific button functionality options you need based on which program you are using. Deselect any options you are not using.
Listen: IP and Port number is where the software listens for messages, specifically from PeelCapture. Set this to a unique port.
Connecting to Peel Capture
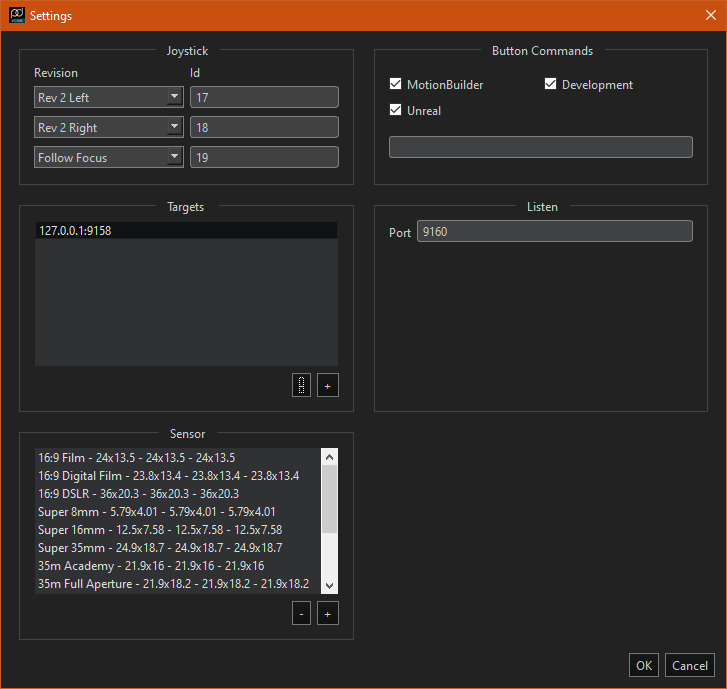
To trigger Record/Stop/Playback from VCAM follow these steps:
- In the Desktop application, add a target by navigating to Options -> Settings -> Targets -> Click the ‘+’ button.
- In the ‘Host’ field, enter the IP address of the machine running PeelCapture.
- In the ‘Port’ field, enter a port number that is currently unused.
- Click ‘OK’ to confirm.
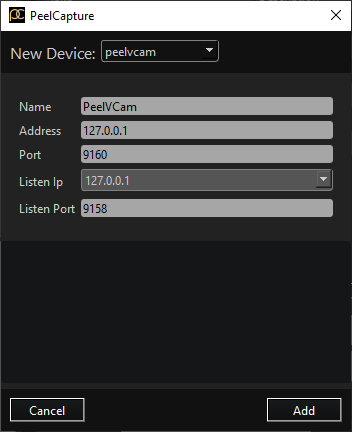
- In PeelCapture, add a new device in the Devices Panel.
- Select ‘peelvcam’ from the dropdown menu.
- In the ‘Address’ field, enter the IP address of the machine running the Desktop Application.
- In the ‘Port’ field, enter the ‘Listen Port’ value found in the Desktop Application’s settings.
- For the ‘Listen IP,’ select the IP address you mentioned in step 2.
- In the ‘Listen Port’ field, enter the port number you entered in step 3.