Workflow
This section provides a step-by-step overview of the general workflow for using PeelCapture.
- Login to PeelCapture portal.
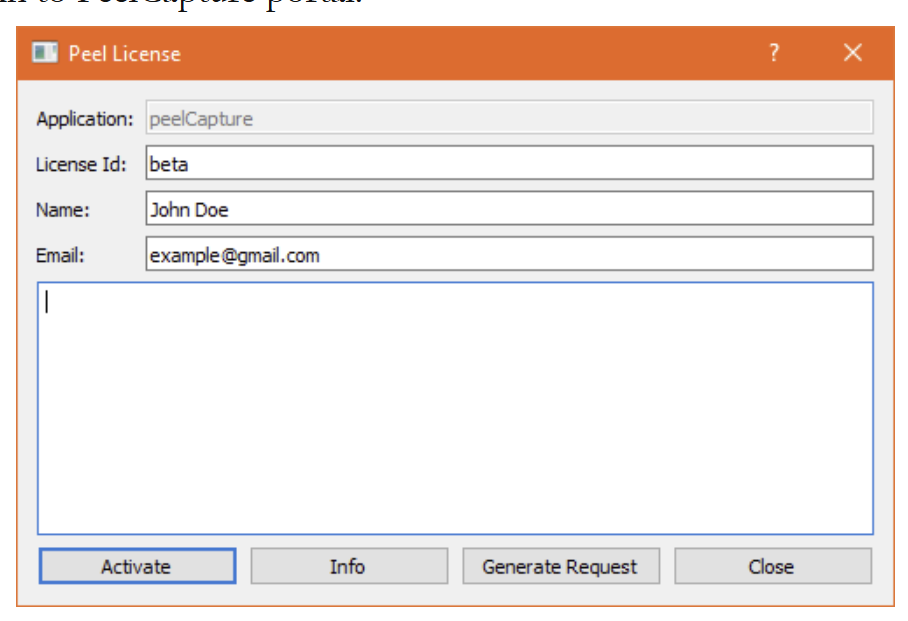
- This dialog will appear if you have not already activated your license, you can activate a license by clicking Generate Request and then Activate. Once you see the dialog below, it is complete and you may click Close.
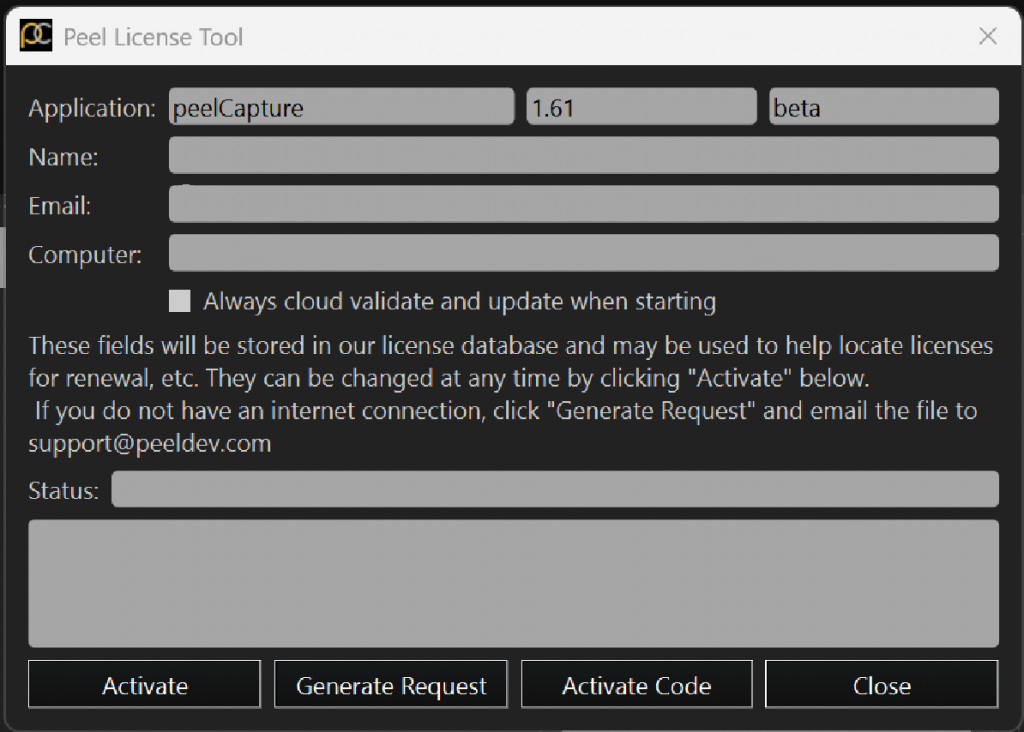
- This window can be accessed by selecting the ‘Check License’ option under Help. Note: The black version is the window that displays while PeelCapture software is running.
Starting a Shoot
- IMPORTANT: Data Directory: Ideal Folder Structure → Company/Project/Shoot
- Set the data directory via File → Settings → Data Directory →
 .
. - For compatibility and ease of use, it is best that you structure your data folders in the following manner: Company/Project/Shoot
- Company: This is the name of your company on the PeelCapture website. This should be the parent folder and spelled the exact same way as it is on the website. This folder should contain all project folders.
- Project: Parent folder for all shoot folders for your project.
- Shoot Name: Parent folder for all the data for a single shoot.
- NOTE: PeelCapture will function properly without this folder structure but this folder structure will allow for the use of Append in the Uploader and compatibility between your local repository and the remote repository.
- Set the data directory via File → Settings → Data Directory →
- Save your PeelCapture session via File → Save As.
- Save the file in the Data Directory folder you selected in the previous step.
- This file will be used to populate your shoot day’s data to the website via the uploader.
- This file can also be used to revisit or reopen a previous shoot day.
- Add your devices with the + button in the Devices Panel.
- Specific Setups for each supported device can be found in the Device Setup Documentation
- Set the Timecode.
You are now ready to record with PeelCapture.
- If your devices are set up correctly from the previous step, the only thing you need to do is add your Take Details and hit
. All devices should turn red when recording.
Create a Test take and press the record button to ensure everything is working before starting your shoot. - You can go to the File drop down menu to SAVE AS. This will save all of the shoot’s information contained in Peel Capture displayed in the Recorded Takes Panel as a .json file.
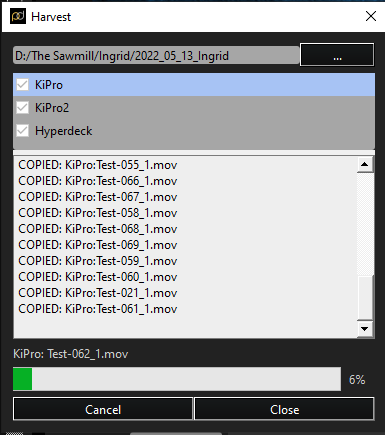
- When you’re finished shooting, go to Publish button and select Collect Files. Click the “…” in the top right to select the folder you want the files to be stored. It is best practice to use the same folder as the one you saved the .json file in. Then select the devices you want to get the files from and click Get Files.
- Next follow the instructions on how to use the Peel Uploader.
- Once your data is uploaded, follow the instructions on how to use the Peel Capture Website to view and edit your shoot’s data.

Peel Uploader
Peel Uploader is our application to batch upload and download your Motion Capture and Reference Camera files to our Website. Instructions on how to use Peel Uploader is as follows:
Create a Connection
This is the instruction in order to create a new connection to the PeelCapture website to upload or download data. If you already have a connection preset, select the desired one and move onto either the Upload or Download section.
- Access the Uploader by selecting Publish → PeelCapture.
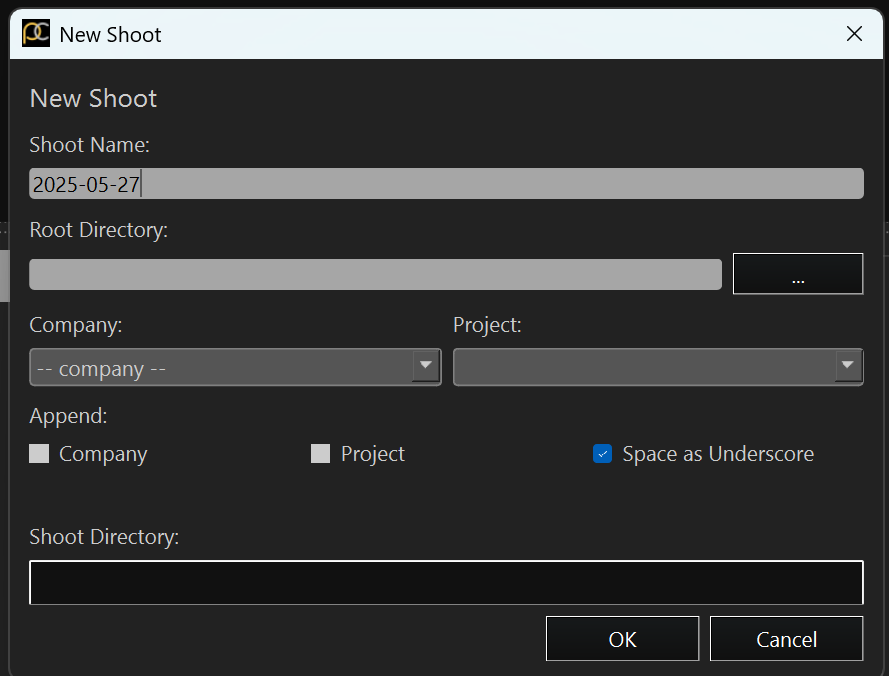
- Add a new Shoot name if this is your first upload of the day and select OK, otherwise hit Cancel.
- Next to the Connection dropdown, click “…” and select “New Peel Capture” from the “…”:

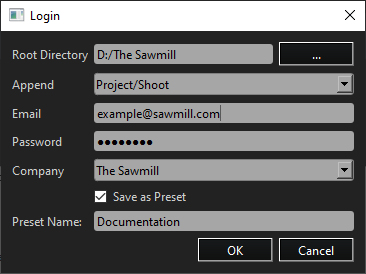
- Set the data directory to where your data folder is located.
- The Append value allows you to use one company folder and conveniently switch between projects and shoot days. If you have the folder structure Company/Project/Shoot then select the Company folder for Root Directory and select Project/Shoot for Append as shown above. If you don’t have this folder structure select None for Append and point to the Shoot folder instead for Root Directory.
- Put in your email address and password (created on http://beta.peelcapture.com).
- Select the company associated with this upload. (If following our suggested folder structure, it should be named identical to the Root Directory folder)
- Click “Save as a preset”.
- Name the connection.
- Click OK.
- Set the data directory to where your data folder is located.
Upload or Download
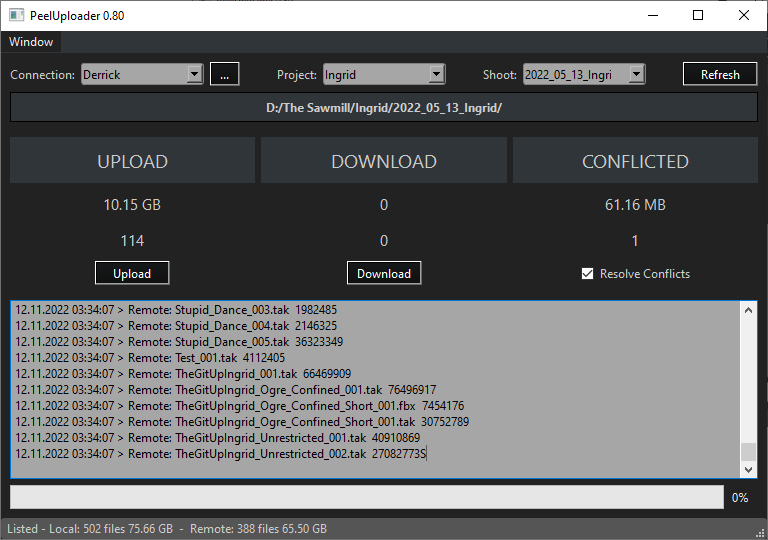
Once a connection has been established, you can easily upload or download your data from PeelCapture. To upload data select or create new project and shoot options from the drop downs.![]()
PeelCapture will compare the files located on the local and remote directory folders based on the connection’s local directory folder and the PeelCapture’s database based on the Company/Project/Shoot folder structure. Missing files on either side will prompt an Upload/Download of the files along with the details of the total size of the data and the number of files. Simply click the corresponding button to upload or download the data to create synced folders.
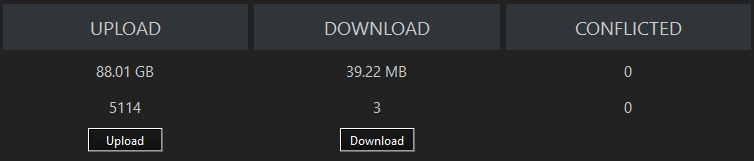
Conflicted

When two files have the same name but different sizes, PeelUploader will note this as a conflict.
Checking Resolve Conflicts overwrites the remote file with the local file upon the next Upload.